
July 31 is National Avocado Day so I thought I would share some general avocado tips to help everyone maximize their enjoyment of this wonderful fruit (yes, it is a fruit!).
Avocado Tip #1: Ripening avocados
For me, finding a perfectly ripe avocado is almost impossible. It happens about one trip in 20 to the grocery store, and then it's usually when I don't want an avocado that particular day!
Instead, my approach is to buy unripe avocados, preferably not super green but at least starting to ripen. Then, at home, I place these in a brown paper bag, which I usually have on hand from my last trip to the liquor specialty spice store. As fruit ripens, it releases ethylene gas. By containing this gas in the bag, ripening process is accelerated. Depending upon how "green" they are, avocados will usually take anywhere from 2-5 days to ripen. In other cases, you might have an avocado just barely starting to ripen. To kick-start the process, add that to the bag, too.
Would you like to save this recipe?
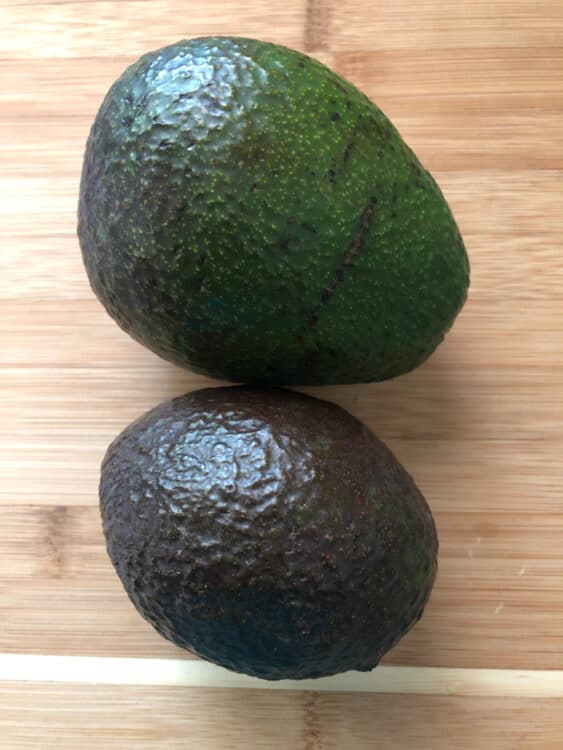
To illustrate, I used one very large green avocado and added a pretty ripe one to the same bag.
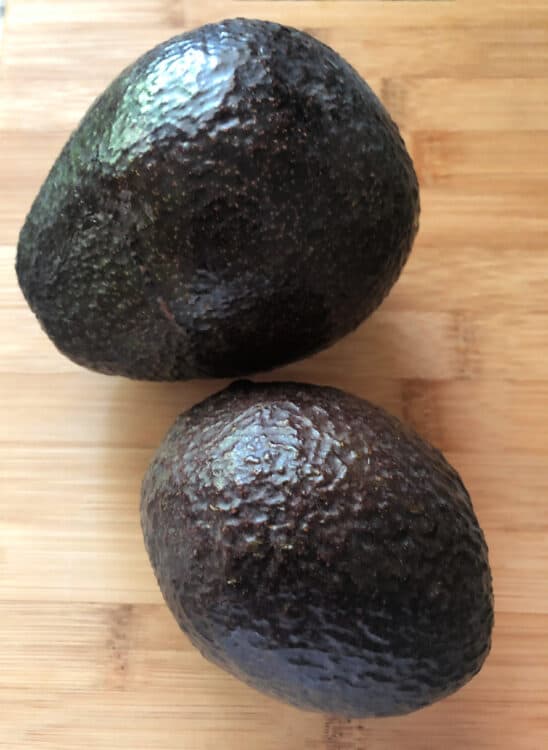
Two days later and the large avocado is much riper! At this point I removed the smaller avocado and just let the larger one finish ripening on its own.
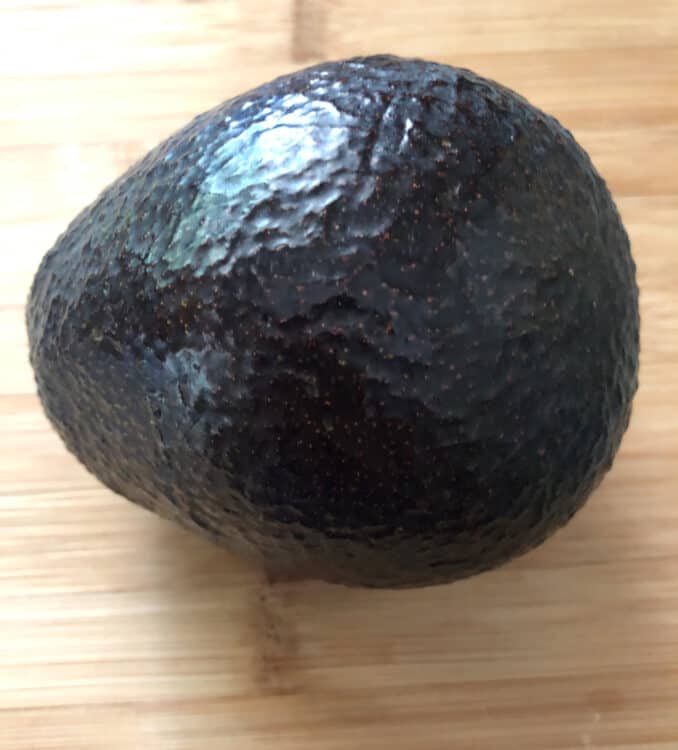
One day on its own (3 days total) and this big beauty is ready for whatever you need!
To test for ripeness, gently squeeze the fruit. If there's a slight "give," consider the fruit ripe enough. Then, place it in the refrigerator until needed for delicacies like guacamole or avocado toast. Yum! 😀
Avocado Tip #2: Cutting technique
Caution! Cutting an avocado can be hazardous to the hands! Google "avocado hand" to see the gruesome results. Please be careful. Probably, the most dangerous step is removing the pit.
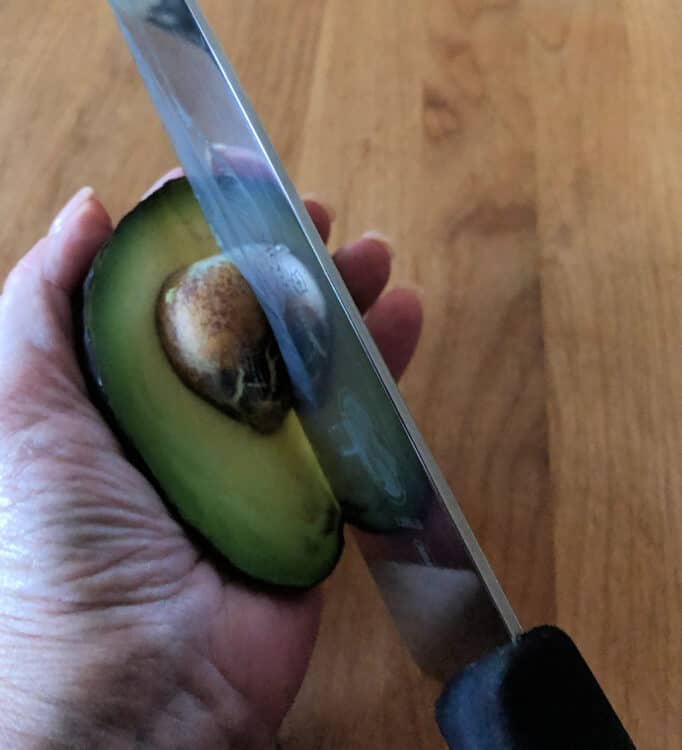
We all want to hold the avocado in one hand and whack the pit with the knife hand. I've done it plenty of times myself. But if that knife slips, plan on a trip to the ER.
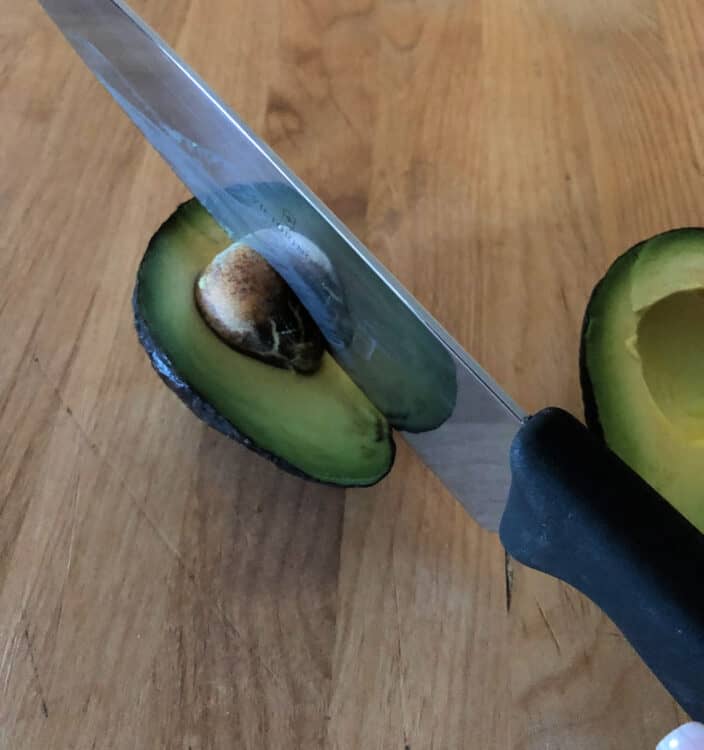
To safely remove the pit place the pit half on the cutting board and then whack it with a knife. I like having the full use of both hands.
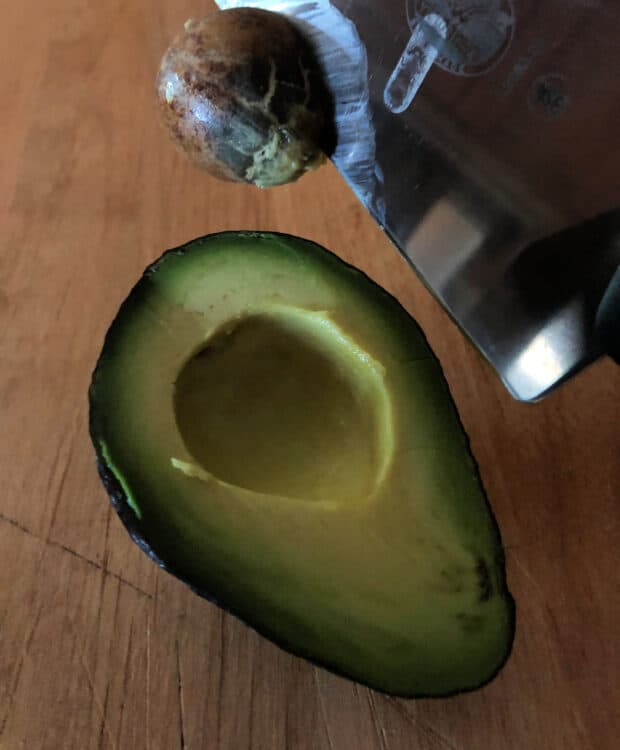
Once the knife is embedded in the pit, a simple twist removes it.
To recap:


Avocado Tip #3: Keeping cut avocados green
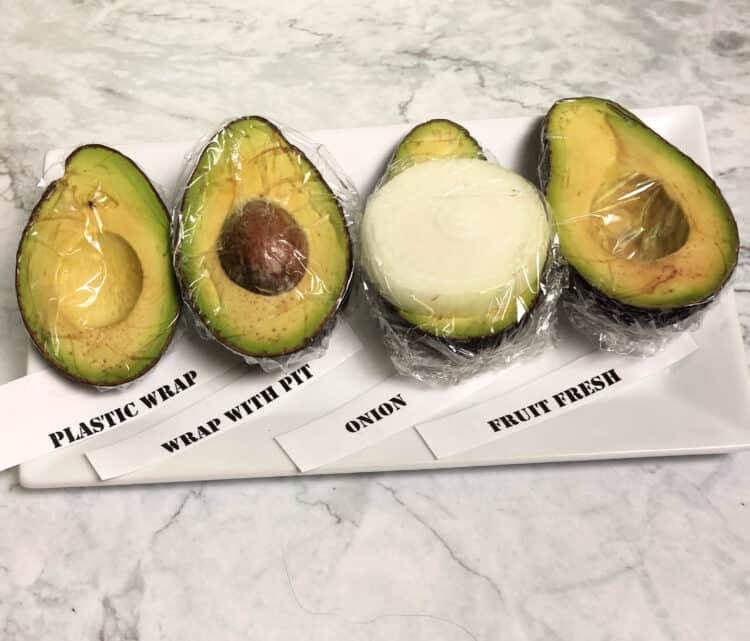
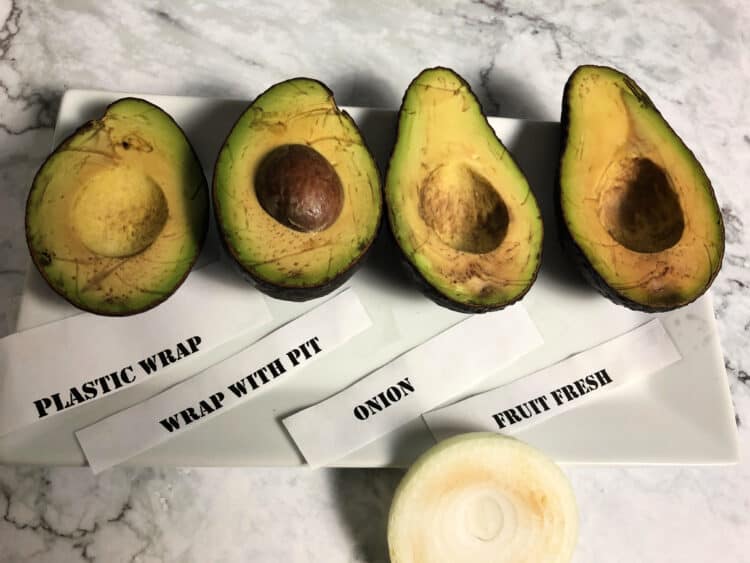
When exposed to air, cut avocados turn brown due to oxidation, the same process that creates rust. Ick. The flavor difference is actually very slight but most people (myself included) just can't get past the look of "rusted" avocados. So, finding ways to prevent browning is a popular topic. I've seen and heard several suggestions, such as: tightly wrap in plastic wrap, include the pit with the avocado, use a slice of onion on the surface, add Fruit Fresh.
Side by side comparisons - cut avocado
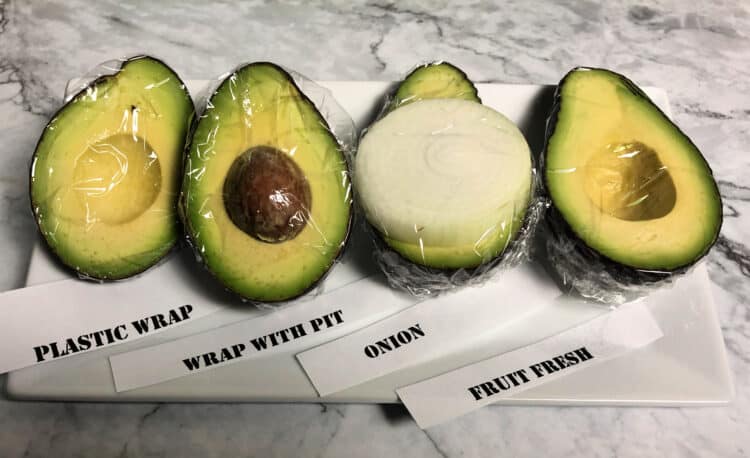
I decided to try each of these methods side-by-side to see which performed best.
To be honest, I expected more of a difference. This picture was taken after 24 hours, and it looks like every half is slightly brown to about the same degree.
After eight (8!) days, all the halves looked slightly brown yet still entirely edible.
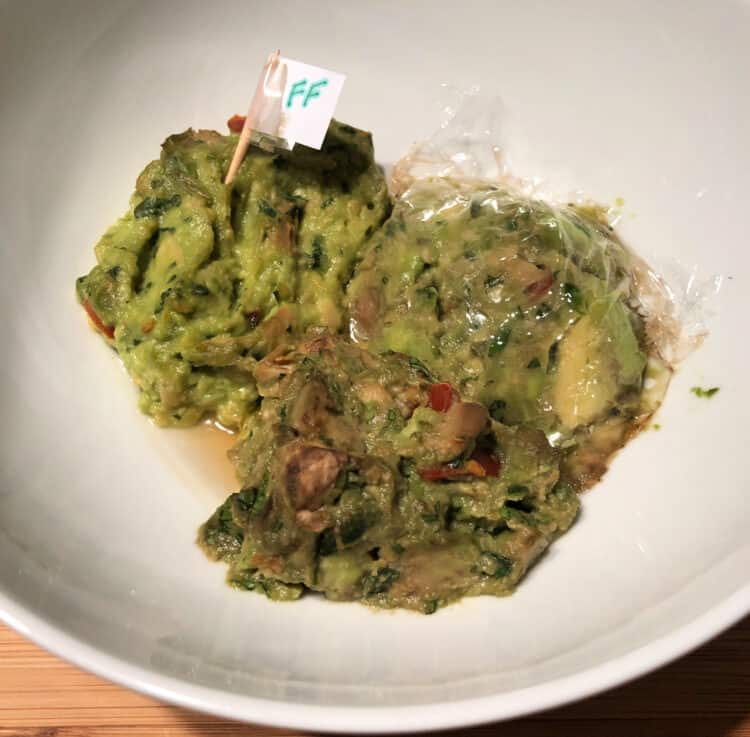
Side by side comparisons - guacamole
So, I decided to take this experiment a step further (actually, three steps further). As a test, I made a single batch of guac, and treated it three ways: #1) I covered the surface tightly with plastic wrap #2) Added Fruit Fresh #3) as any good scientist knows, I created a control, leaving a batch untouched.
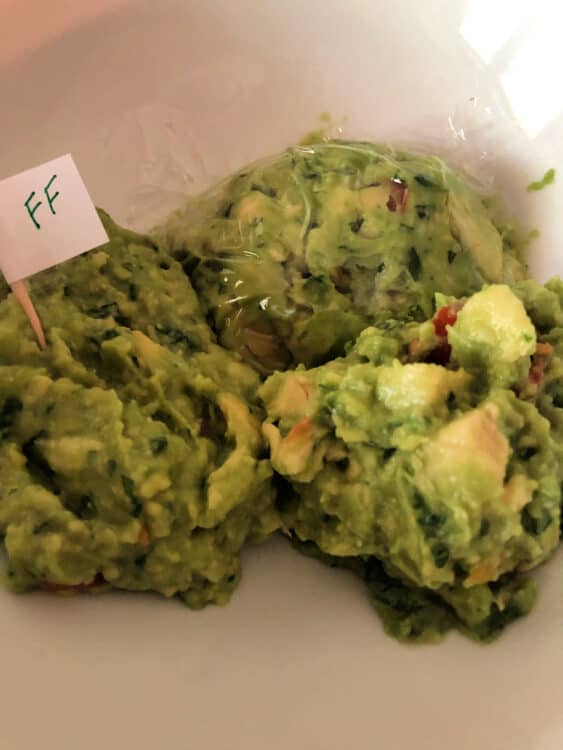
I put all three in the same bowl and covered it with a single piece of plastic wrap over the top. The "FF" flag marks the Fruit Fresh portion.
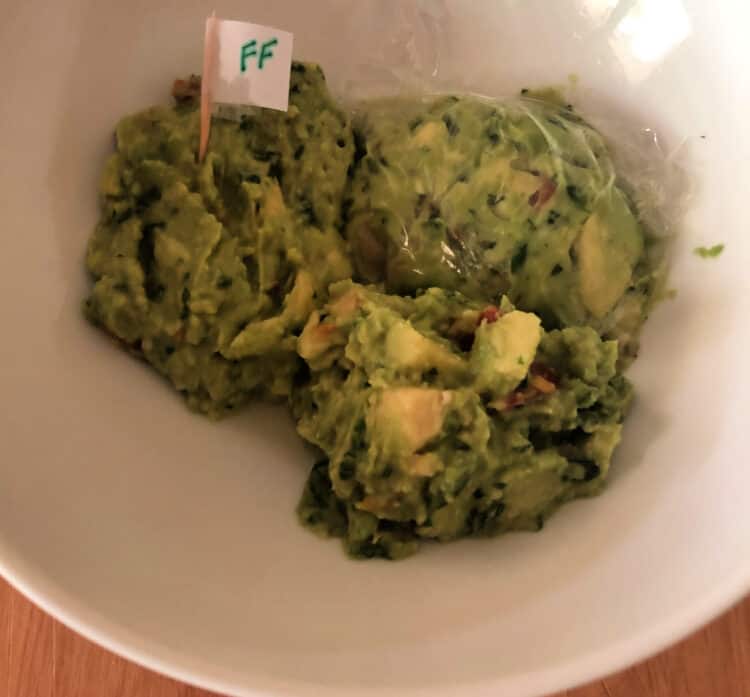
This bowl was placed in the refrigerator overnight, for a full 24 hours. And the results? Myeh. Not much.
Then, a light bulb went off in my head - duh! - this is NOT what we do with guacamole. We put it in a bowl and let it sit out at room temperature for dipping purposes. So, I took that bowl out of the fridge, removed the top plastic wrap and waited to see changes.
Sure enough, after 8 hours the untreated dip is definitely starting to brown.
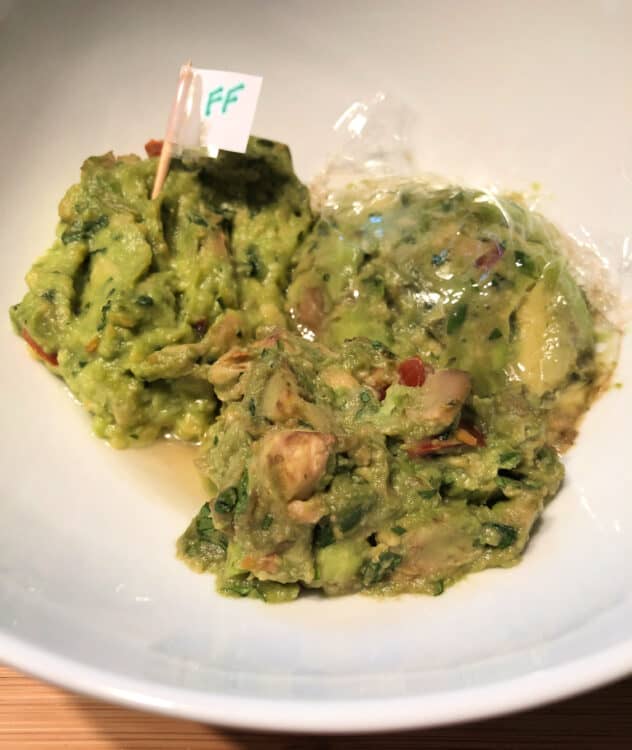
And, predictably, it's worse at 12 hours.
I then wrapped the bowl again and stuck it in the fridge. After another overnight, here's what happened.

No surprise. The untreated guac looks gross. But it's nice to see that the portion treated with Fruit Fresh looks just as good as the portion covered tightly with plastic wrap.
Fruit Fresh?
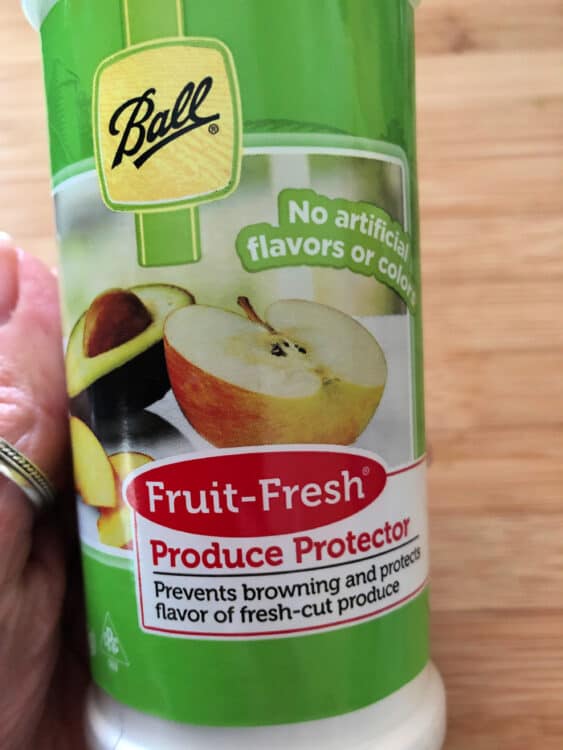
Note: If you're wondering: "What is Fruit Fresh? And, what about chemicals?"
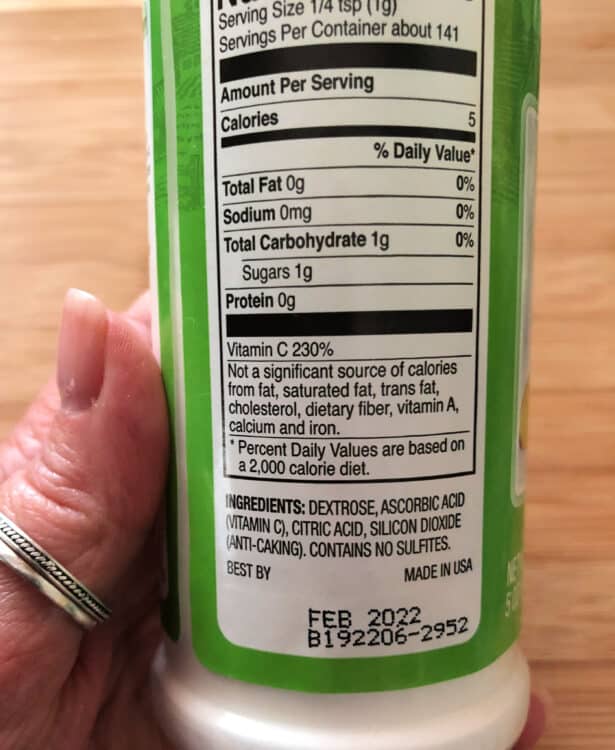
Here's a picture of the label. Mostly citric and ascorbic acid. These are ingredients found in nature. I can live with that.
So, Fruit Fresh is an option. (Note: I have no business relationship with Fruit Fresh or its parent company).
Hopefully these avocado tips achieve maximum "serve-ability" and "deliciosity" (yes, I made up those words) for this most excellent fruit!
Texasgirl
This will definitely be on the menu this week!!