
It's time to have a little fun with holiday food. Sometimes this means making food of specific colors, but this time I went for a shape. And I took the easy route and used pre-made dough to make these Easter bunny cinnamon rolls. It's all about the cuteness!
Ingredients Needed
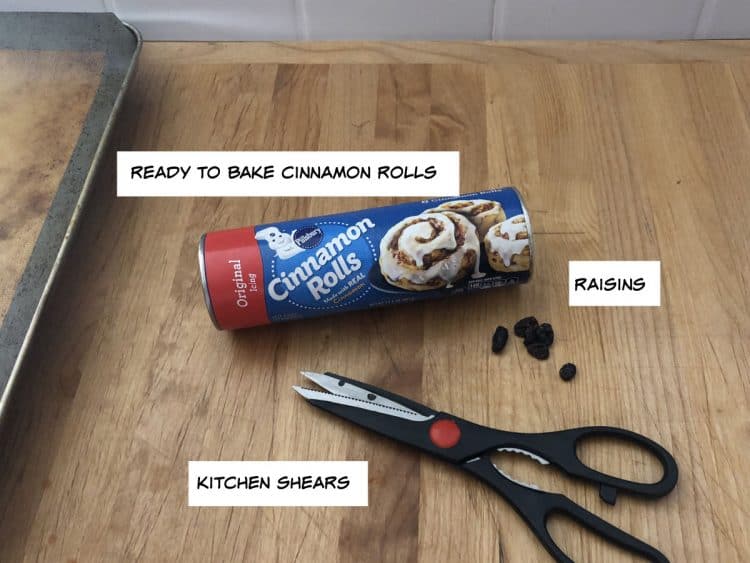
- Refrigerated Cinnamon Roll dough (12.4 oz)
- Raisins

Grands vs Regular Cinnamon Rolls
I stick with the Pillsbury brand rolls for these, and I have used both the regular size as well as the "Grands." To be honest, if I'm simply making cinnamon rolls for our eating pleasure, the Grands are my first choice. They make a bigger and fluffier cinnamon roll.
But to make these bunnies, I prefer the smaller rolls. Somehow the cuteness effect doesn't work as well with the Grand-sized rolls.
How to make the Cinnamon Rolls into Bunny Shapes
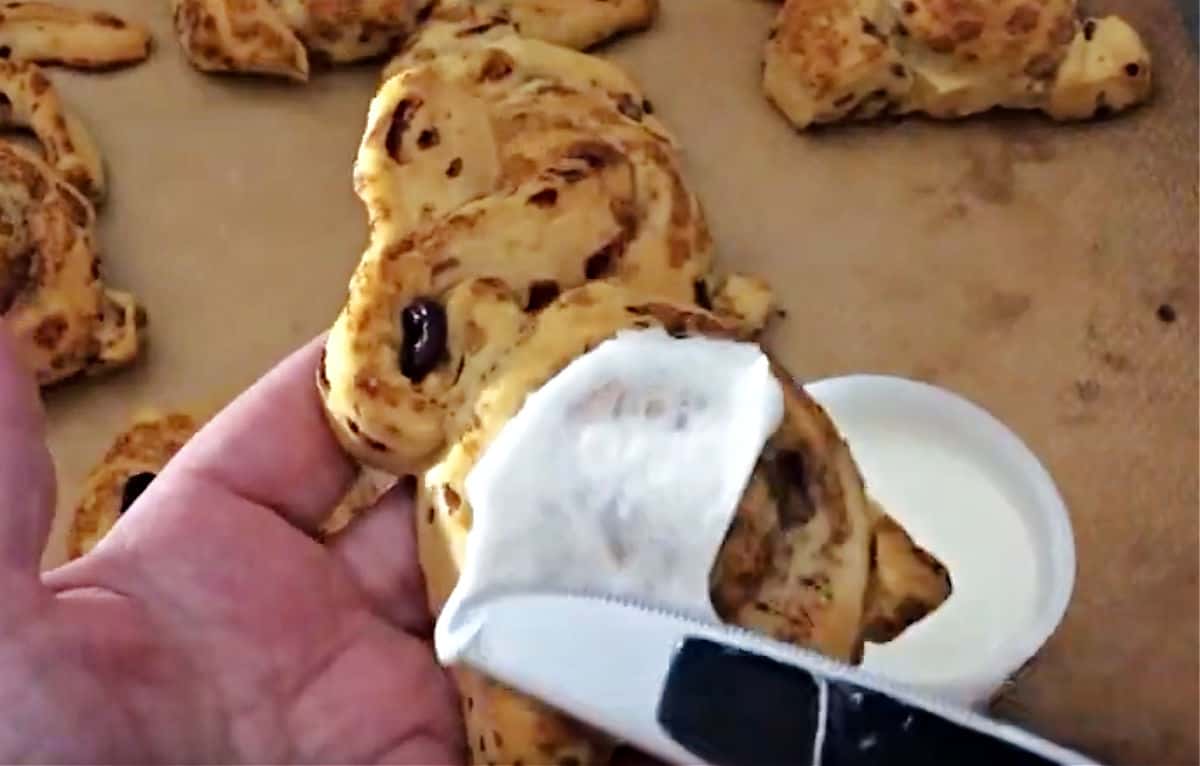
The one disadvantage to the smaller cinnamon rolls is that they do not easily separate/unroll. There's something different in their construction compared to the Grands. But as I like to say: there's always a way!
I use a kitchen shears to help this along. It is easy to see the rolled area, just not easy to separate it. I take my scissors and snip along that line to unroll the dough. (There is a video in the recipe card that shows this)
You need to unroll about half the dough and leave the center intact. Then use the scissors to cut the unrolled dough from the circle. The remaining circle will form the bunny's body. Snip a small amount from the end of the unrolled dough to form a tail.
The remaining unrolled dough makes the head and ears. Carefully roll half the dough to form the head. I like to make this an oval shape, as that's a little closer to an actual rabbit's head.
The rest of the dough becomes the ears. Once again, use the kitchen shears to split the dough lengthwise.
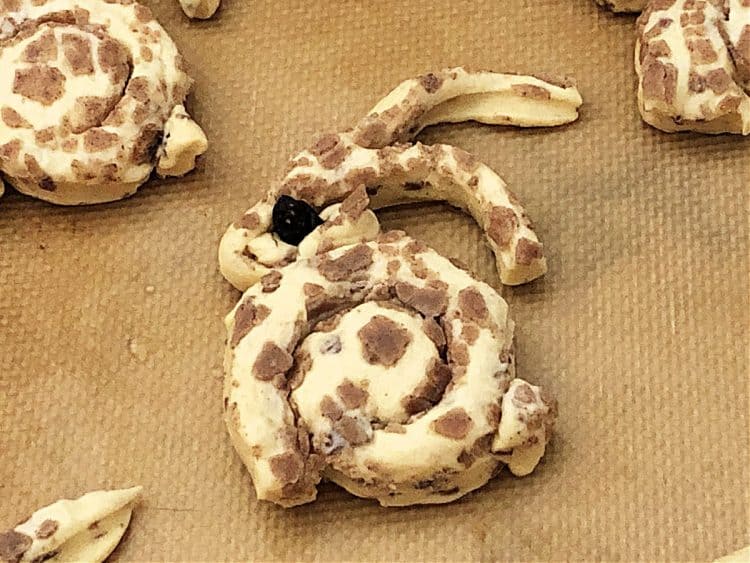
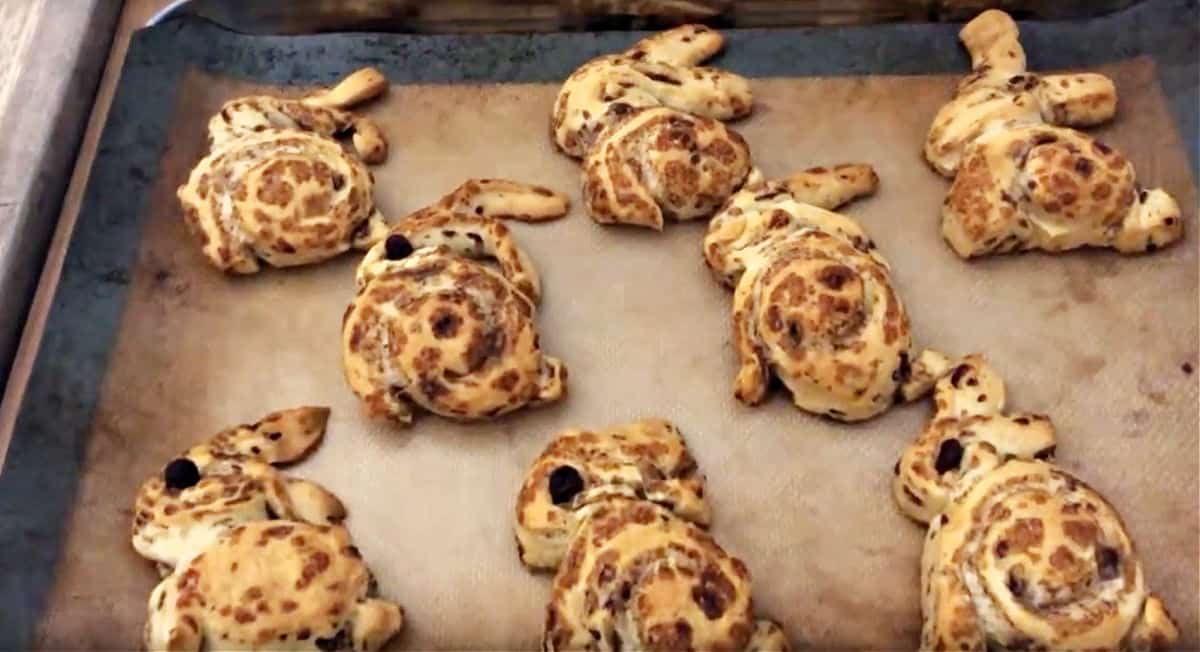
Arrange the pieces on a parchment paper lined baking sheet. (Or I used a silicone mat) To help the pieces attach to each other, you can moisten the edges with a little water right at the spot where the dough pieces will touch each other. But mostly I skip the water and trust that the pieces will stick at least 80% of the time. 😄
I like to shape the ears by separating them slightly. Sometimes the dough thickness is uneven so I try to even it out and also pinch the ends to make the ears pointed instead of square, as needed. Each piece of dough will be a little different, so shape it the best you can. (note: if you'd like, you can add a raisin for an eye now, before baking. Otherwise, it can be added after baking and frosting)
Baking the Bunnies
I bake these bunnies at a lower temperature than the package instructions. It helps prevent the ears from getting all crispy and burned.
Bake them at 350F for about 15-18 minutes. I always check at the 10-minute mark and like to rotate the pan to promote even baking.
Then check again after 5 more minutes to determine whether they need an additional minute or two. All ovens vary so adjust accordingly.
Would you like to save this recipe?
Decorating the Bunnies
The hardest part of making cinnamon rolls is waiting for them to cool so you can add the frosting. It's torture! The cinnamon aroma fills your house and you just want to devour them!
(On the other hand, possibly a good way to get some family members out of bed!)
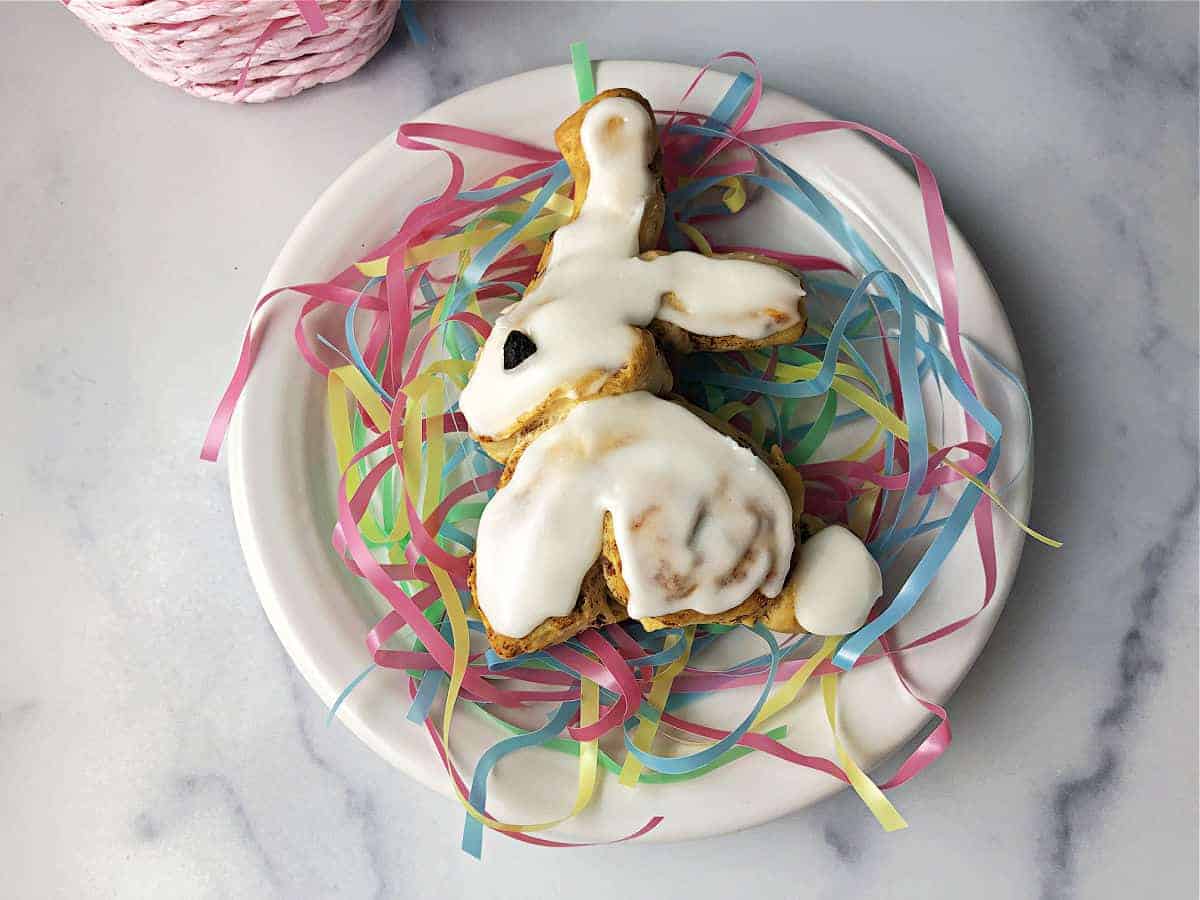
But frost we must! It's needed both for taste and for cuteness. Allow the rolls to cool, then use the frosting to cover each bunny.
The finishing touch? Raisins for eyes. Place a raisin on a roll and then take a look. For these smaller rolls, I sometimes cut my raisins in half to make smaller eyes. This will probably vary depending upon how juicy your raisins happen to be.
I have also tried a cut-up date for the eyes, but it wasn't as dark, so I like to stick with raisins. You could also use a piece of jelly bean or candy Googly eyes if you like - you do you!

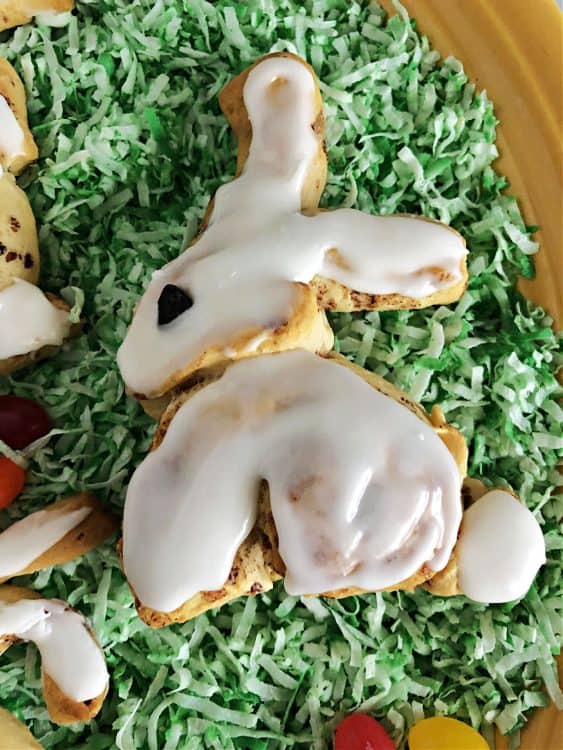
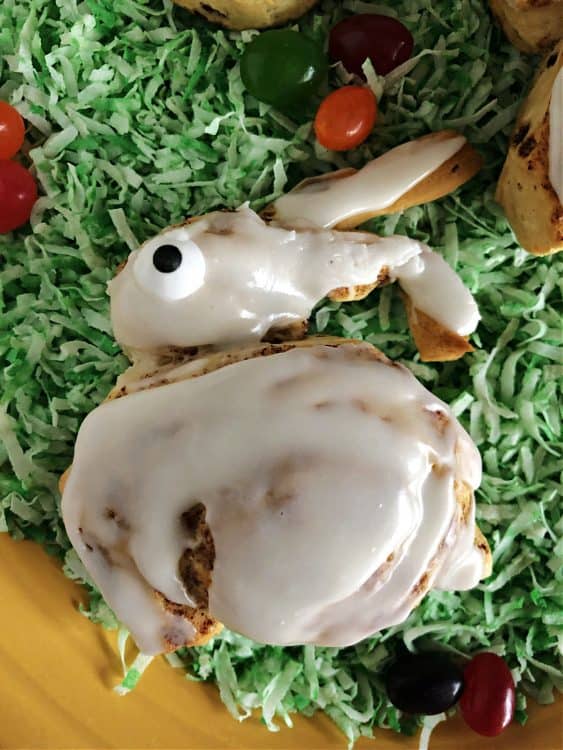
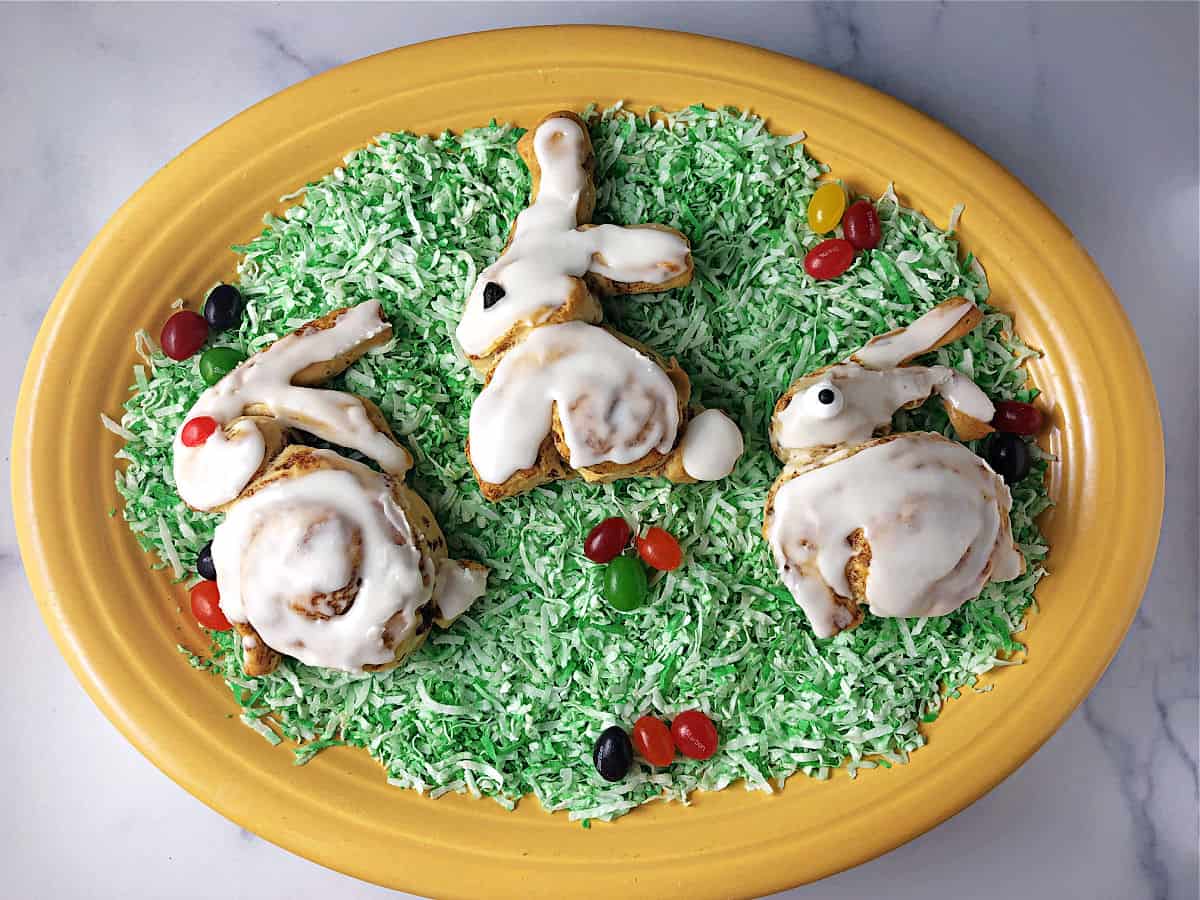
These Easter Bunny Cinnamon Rolls are the cutest way to celebrate the holiday! You can even display them on edible Easter grass! And check out the same concept used to make bunny dinner rolls, to make your Easter dinner complete!
For another fun bunny idea, try making some Bunny Butt pancakes. It will start everyone's day with a smile!
📖 Recipe
Would you like to save this recipe?
Easter Bunny Cinnamon Rolls
Equipment
- Kitchen shears
Video
Ingredients
- 12.4 oz ready to bake cinnamon rolls Pillsbury
- Included frosting or make your own
- 4-8 raisins candies, or Googly eyes (optional)
Instructions
- Open the tube of dough and carefully separate into individual rolls. Preheat oven to 350F.12.4 oz ready to bake cinnamon rolls
- Gently unroll about half of one roll. Use the kitchen shears to help cut the stick dough. Cut off the unrolled portion. Place the remaining roll on a baking sheet (parchment lined if preferred.)
- Snip a small piece from the end for a tail. Then carefully roll about half the length of unrolled dough to form a head. I feel an oval shape most closely mimics a real bunny's head, so fold over about a half inch of dough then continue rolling from there.
- Once the head is formed, use the kitchen shears to cut lengthwise along the remaining unrolled dough. Position the head on the baking sheet with the rolled portion. Add the tail. Position the ears as desired - I like to make a slight curve. (If desired, add a raisin eye here, or wait until the frosting step)
- Repeat with all other rolls.
- Bake at 350F for 15-18 minutes. Rotate at 10 minutes to ensure even baking. Allow to cool before adding frosting.
- Decorate with white frosting and add a raisin, candy or Googly eye as desired.Included frosting, 4-8 raisins
Nutrition
Nutrition values are estimates only, using online calculators. Please verify using your own data.
nancy
haha this bunny cinnanomn roll is super cute ... fun to make with the kids
Sula
So fun!
Kat
What a cute idea!
Sula
Easy and fun!
Cindy Mom the Lunch Lady
I absolutely LOVE these! They are so adorable. I will grab a can of cinnamon rolls on my next grocery trip to make these!
Sula
Kids of all ages will love them!
Ashley
These are so cute! A fun Easter breakfast 🙂
Sula
About as fun as it gets!
Emily
These are going to be perfect on Easter morning!! Thanks for the step by step instructions. I may have to give these a trial run before Easter...! 😬
Sula
They really are the perfect little item for Easter!
Sondra
This is a fun idea! Perfect for Easter.
Sula
Honestly, I simply cannot resist cute food on holidays!
Tyanne
I love how easy this recipe is! My mom used to make something way more complicated when I was a kid, I will for sure show her this!
Sula
Yes, using the refrigerated dough makes this very easy!