
Making pies is an art. And learning how to make pies is a trial-and-error process. Take it from someone who's experienced both the trials and the errors.
Crust is a trick in itself. It tends to either burn or undercook. And, it sags, sogs, rips and plain wimps out. Part of the challenge is that there are so many different pies and so many crusts that accompany the pies.
For instance, when I posted my pie crust recipe, I was focused on pumpkin pie. Those pies require an unbaked crust which is filled and all baked together.
Others require a partial or fully-baked pie crust such as cream pies or meringue pies. Partial baking is needed if the filling requires a shorter baking time than the crust. Some people also like to pre-bake the crust to make it extra crispy.
A fully baked crust is needed anytime you make a so-called no-bake pie. An example would be any cream or custard-based pie for which filling is cooked separately on the stovetop and then poured into an already-baked crust, allowing it to cool prior to serving.
By this time you might be saying to yourself: "There are so many pie crusts and so many ways they can go wrong!" True.
Would you like to save this recipe?
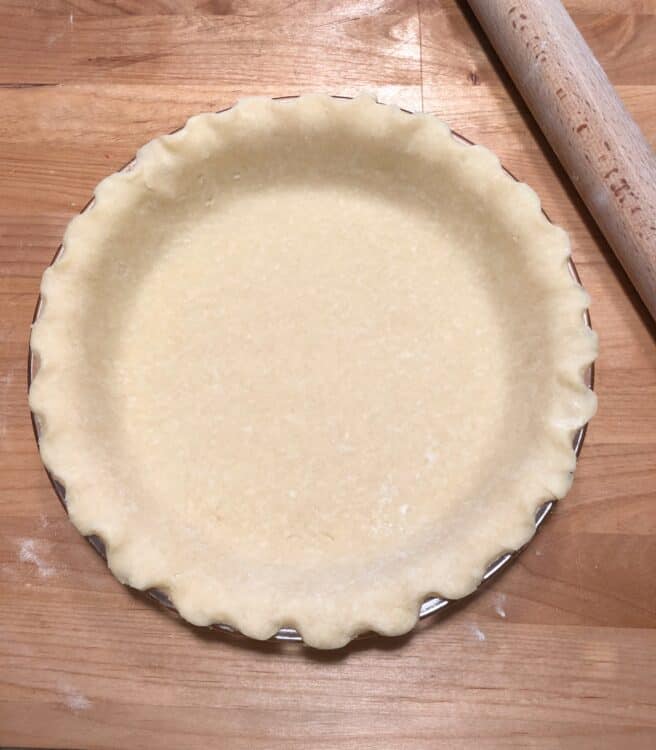
Look at this crust, for example. I rolled it out and placed it in the pie plate, then trimmed to the very edge of the pie plate.
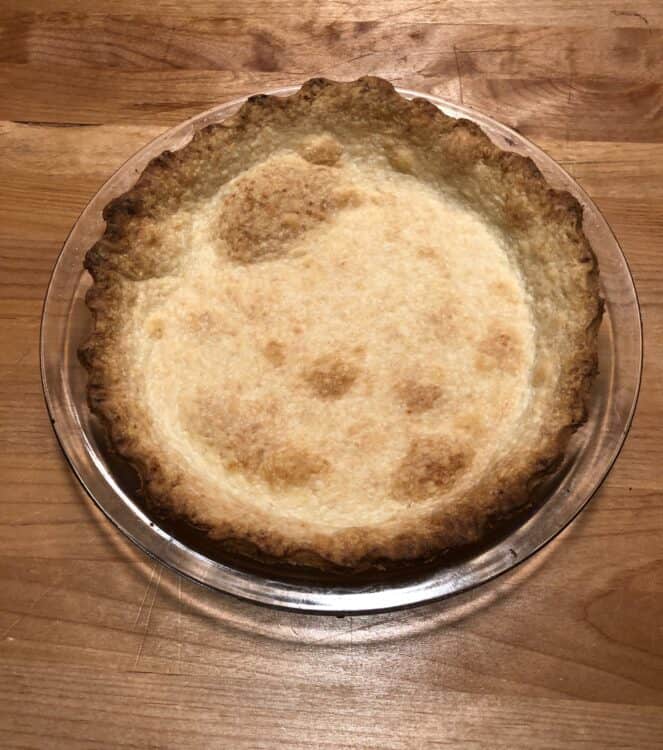
The result? A pitiful, sad, shrunken little crust, all bubbled in the middle. Yikes!
The only thing sadder was the Carnivore's face when he realized I had deliberately messed up a pie crust, and had no intention of filling it with pie!
So how to approach baking the crust? Never fear, pie-making tips are here!
Shrinking crust
Pie crust is essentially butter and flour, with a few other things thrown in to enhance cohesion and taste. When it's all mixed together you've essentially created extremely thin layers of yummy butter and flour. But butter can be both our friend and not-friend because when butter melts it seems to drag down the sides of the crust making it shrivel and sink into the pie plate (see pitiful pie crust above).
Two things to prevent this:
First, make a thick edge at the top of your crust - this allows the dough to "grip" the top of the pie plate, holding the sides in place (also making pie crust lovers extremely happy!)
Second, once the crust is rolled out and in the pie plate, don't stick it in the oven right away. Instead, place it in the fridge for about 30 minutes before baking. This allows the crust to relax a little and sit correctly in the pie plate.
Bubbling crust
Again, that delicious butter is causing issues! Butter creates steam, which rises and sometimes forms humungus bubbles in the crust. There are a couple ways to prevent this: docking and pie weights (yes, I said pie weights).
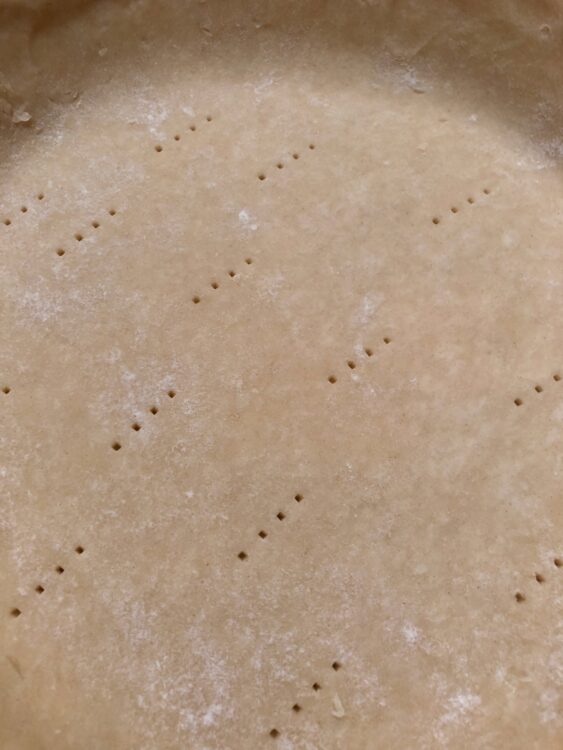
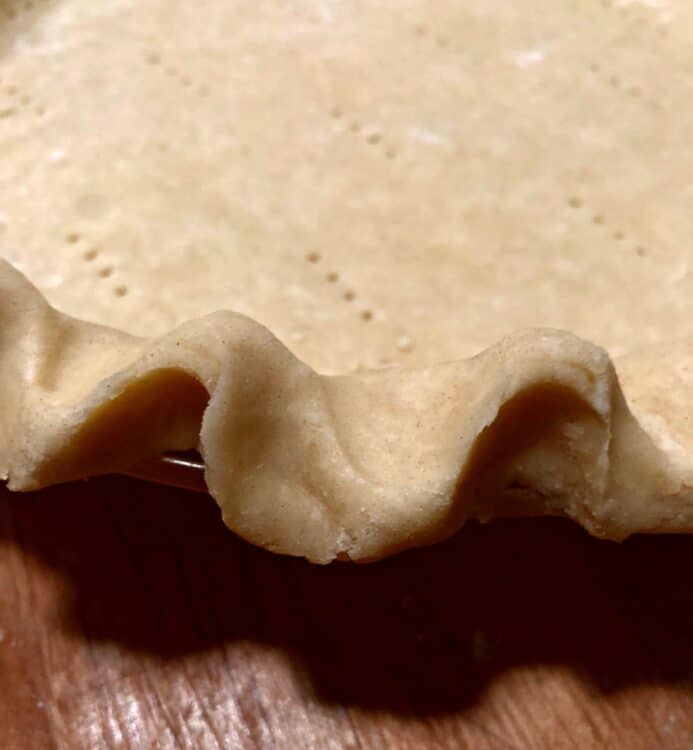
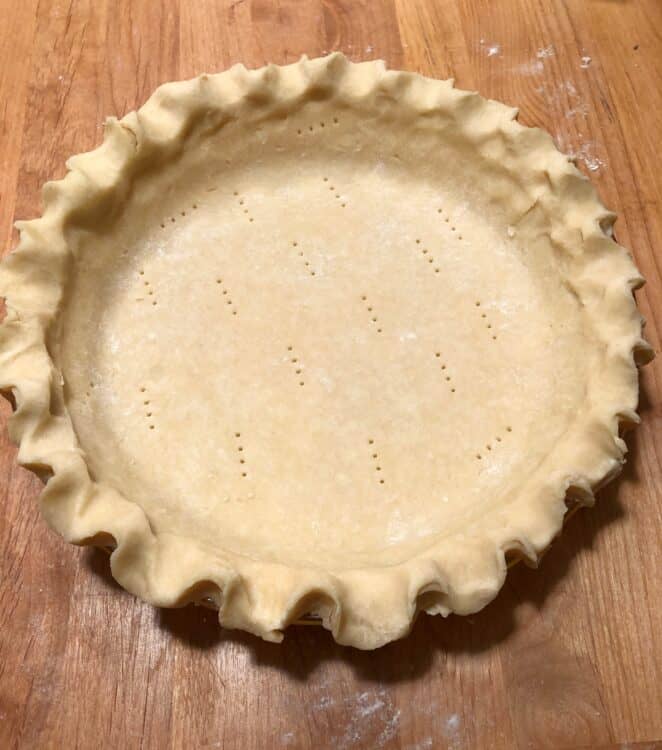
Docking: this is just a fancy way of saying "poke holes in the bottom crust with a fork." The holes allow the steam to escape during baking.
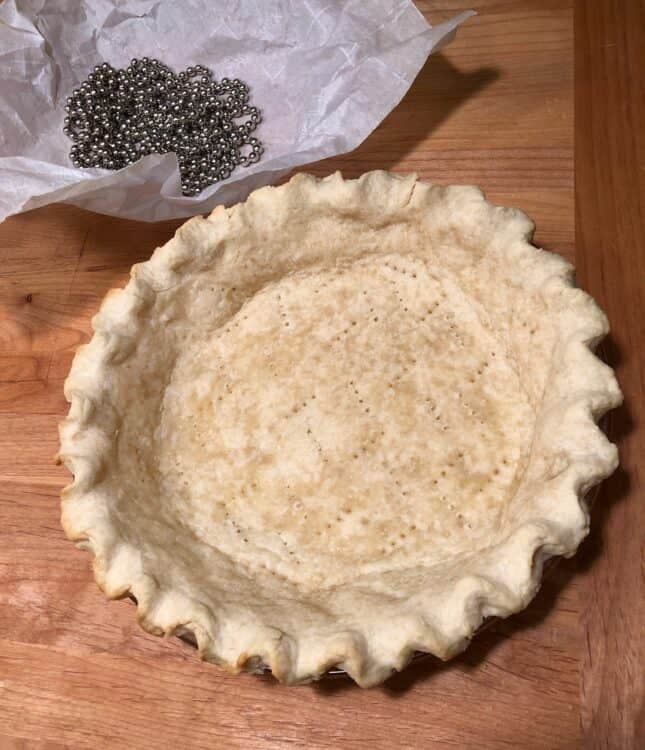
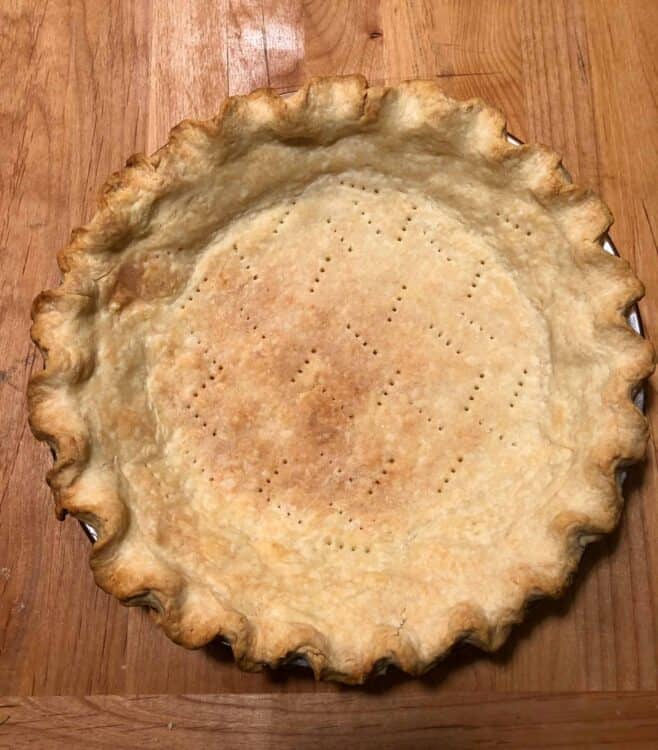
Pie weights: Pie weights pressure the crust so it doesn't rise and bubble up. There are make-your-own pie weights and store-bought pie weights. To make your own, place some parchment paper over the crust and fill with weight, such as dried beans. Then, bake for about 15 minutes, remove the parchment and weights and bake for an additional 15 minutes for a fully-baked crust.

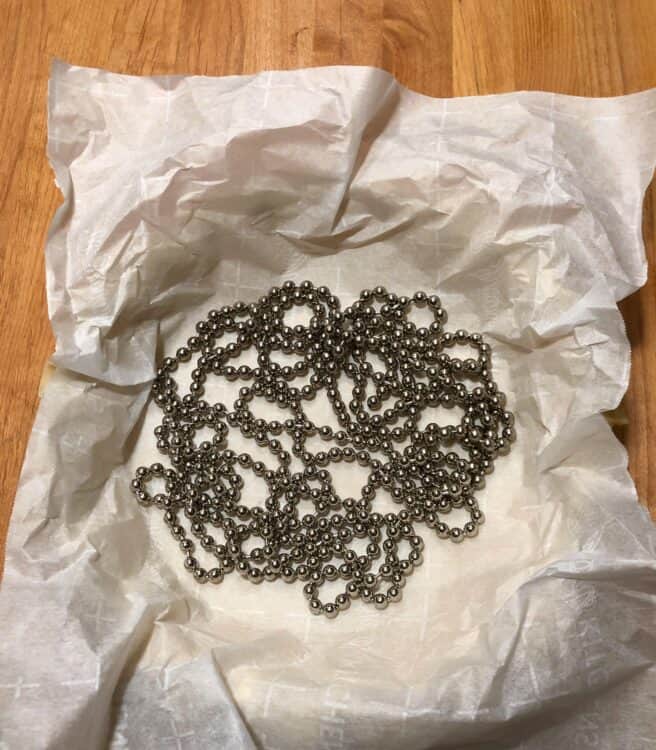
Store-bought pie weights include ceramic balls or chains. I prefer chains (Oy Vey! . . . such a way to treat a pie!) because they are easy to place and remove. I use 2 sets to fully cover the area.

Ready to bake 
After 15 minutes 
Fully baked
Soggy crust
This pertains mostly to fruit pies. Typically, you have an unbaked crust with a fruit mixture added. However, these mixes are commonly "soupy." Even though there are thickeners in the fruit mix, they don't always activate quickly enough to prevent that bottom crust from getting soggy.
The solution? Egg wash. No, don't wash your eggs. Beat them!
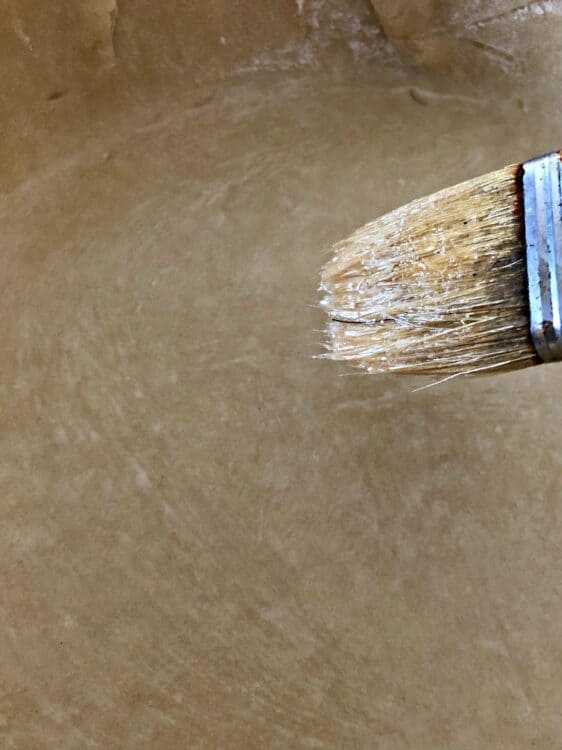
Beat some egg white to create the wash and using a pastry brush apply to the surface of the crust. The egg forms a thin barrier allowing the crust to cook separately from the fruit filling.
Super-tip: That egg wash also helps create a picture perfect top crust. Just brush some on to create a beautifully brown and glossy finish.
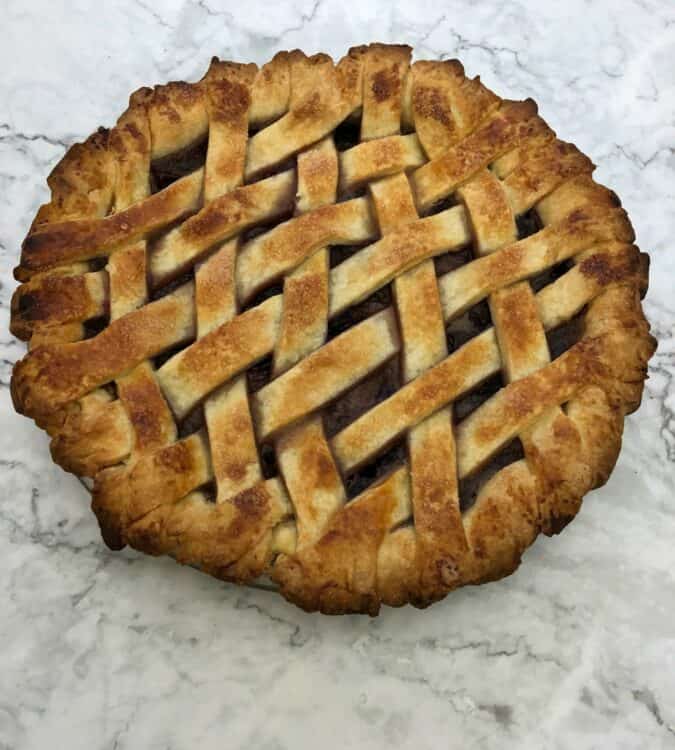
This cherry pie was brushed with egg white before baking. Mmmm!
Burned edges!
Crispy critter edges are a common problem with fruit pies because of their long baking times. Solution: Cover the edges of the crust for about the first half of baking time (the time is usually specified in the recipe), then remove the cover to finish cooking.
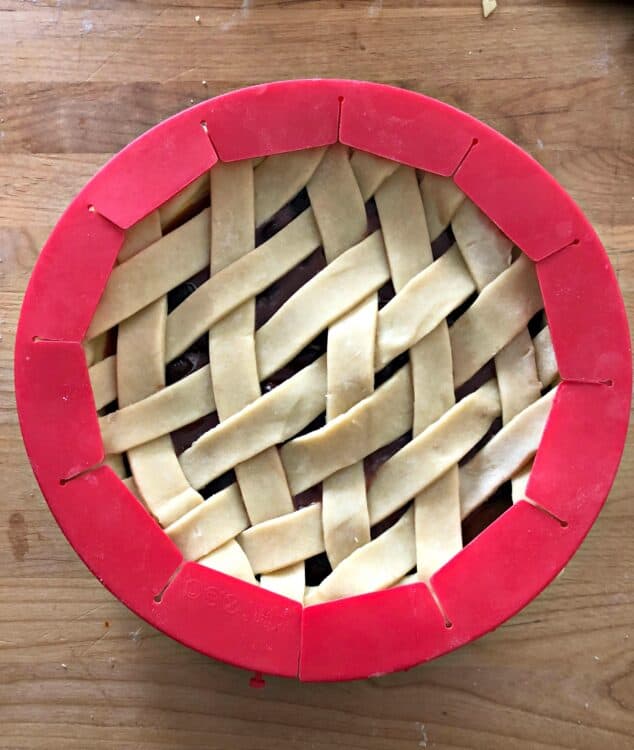
You can make your own edge-covers out of tin foil or purchase a pie protector shield. I have used both with success.
Hopefully these artful tips will help you create the Mona Lisa of pies!
Big Trouble
Very nice job on the pie crusts, Sula! You really killed it at the pinching of the crust edge--that part's hard!
Sula
Thank you. I've had a bit of practice 🙂
Sandi
Wow. Very informative !
Sula
Thanks! I hope people find some useful tidbits in here. 🙂
K. B.
If you put a glass pie plate in fridge and then in a 400° oven will it not shatter?
Sula
In theory, this could be a risk, but I've never had it happen. 30 minutes will cool it off a little but it won't be completely at refrigerator temperature yet. I bake my crust at 375, not 400. I do take a few minutes to prep the crust with parchment paper and pie weights to prevent it from puffing up, so that might help a little also.
However, if you are concerned about this you could probably leave the crust sit at room temperature for the 30 minutes to relax before baking.