

If you’ve ever made bread before, particularly the old fashioned way, you know you’re going to need this no-knead bread recipe.
Throughout history, this food staple was a basic necessity, but it was labor-intensive. I have memories of my mom spending all day making bread. Lots of steps involved. It seemed like she was forever kneading the dough, covering it, letting it rise and then kneading it again.
Now, there’s no “knead.” (See what I did there?)
A scale and Dutch oven make this bread easy
This recipe, courtesy of New York Times Cooking, is very easy. It does not require kneading, and the ingredients are very simple. Not a lot of effort, just time. In total, it takes nearly 24 hours but most of that time the dough is fermenting without you doing a thing. It’s a great weekend project 😀.
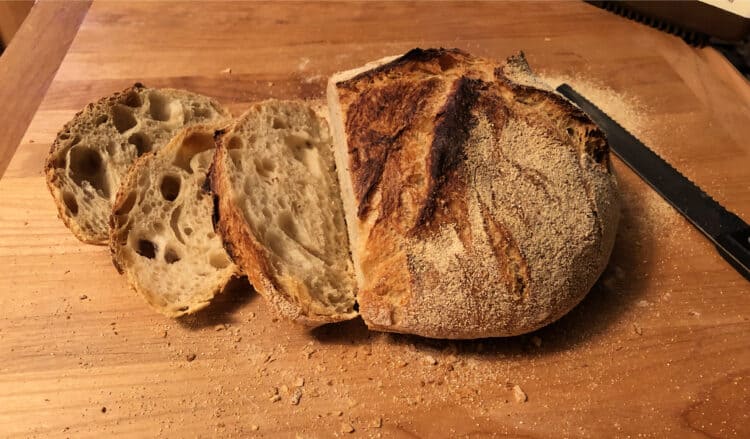
Also, please do not expect soft-crusted grocery store bread. This recipe produces one loaf of a delicious, slightly chewy bread with a hard crust. I like to think of it as old country style bread. It’s fresh from the oven, which is a taste that can’t be beat! And the smell of baking bread? Mmmm.....
There are a couple specific items I recommend to make this: a heavy covered pot (cast iron, enamel, Pyrex or ceramic; I have a 5-quart cast iron pot I use for this) and a small digital scale for weighing ingredients.
A note about measuring ingredients for bread: I am providing the measurements by volume, but most advise to measure these ingredients by weight, so I am providing weights as well. I have started to weigh my bread ingredients based upon this advice. I bought a basic digital scale for this purpose and it has become one of my most-used items in the kitchen.
How to make this bread
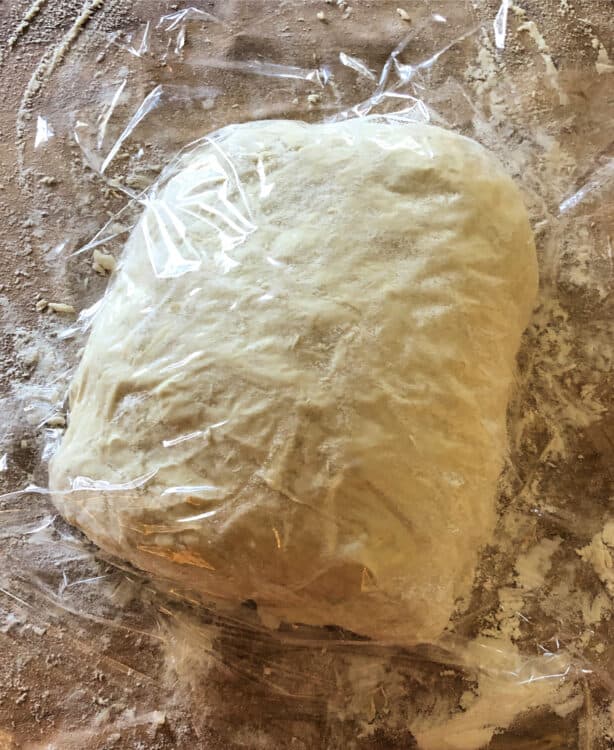
I like to start this the evening before I want to bake it. Combine flour, yeast and salt in a large bowl, then add water and stir until blended. The bowl is covered with plastic wrap and left to rest (ferment) on your kitchen counter for a minimum of 12 hours, but 18 is even better.
When the dough is ready, you will notice that its surface is dotted with bubbles - that’s good - EXACTLY what you’re looking for. The dough is now ready to be taken from the bowl and placed on a floured work surface. Sprinkle the dough with a little more flour and fold it over on itself once or twice.
Cover loosely with plastic wrap (I re-use the same piece I had on the bowl) and let it rest for 15 minutes.
Then, gently and quickly shape the dough into a ball, using just enough flour to keep it from sticking to your fingers or the work surface. Generously coat a cotton towel with flour, wheat bran or cornmeal (I used a combination of flour and cornmeal) and place the dough seam side down on the towel. Dust with more flour, bran or cornmeal. Cover with another cotton towel and let rise for 2 hours.
When it’s ready, the dough will be more than double in size and will not readily spring back if you poke it with a finger. Disclosure: I don’t usually poke the dough, I just trust that it is ready based upon how much it has risen.
At least a half-hour before the dough is ready, preheat your oven to 450F. Also, place the cast iron (or other) cooking pot in the oven to preheat it as well.
When the dough is ready, remove the pot from the oven. Note: Please be extremely careful during these steps. Remember, the pot is 450 degrees, so handle with care.
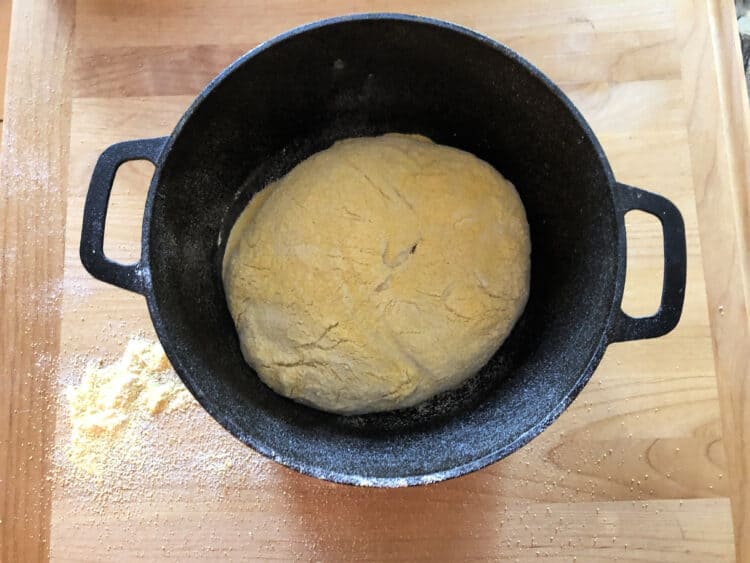
Remove the top towel from the dough, then slide your hand under the remaining towel and use it to turn the dough over into the pot. It will now be seam side up and might look a little messy. That’s okay!
If the ball is crooked in the pan, just give the pan a little shake to even it out.
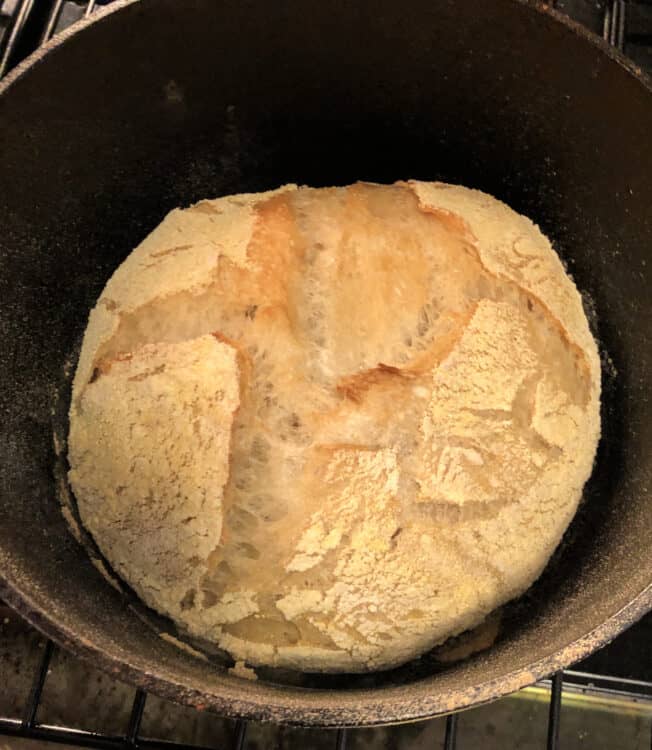
Cover the pan with the lid and bake for 30 minutes, then remove the lid and bake for another 15 to 30 minutes until browned. Turn the dough out from the hot pan and allow to cool on a rack before cutting and serving.
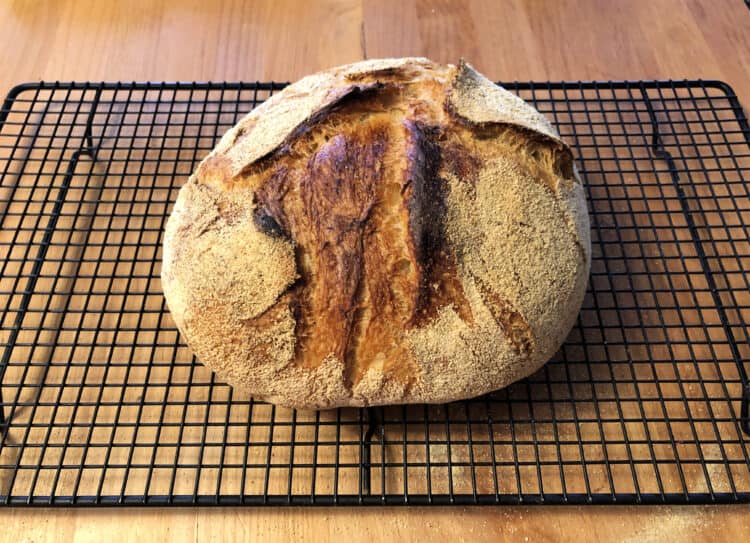
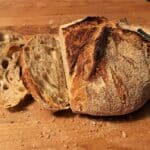
Fresh baked and irresistible Dutch Oven Bread!
If you love making homemade bread and want more variety, check out the recipe I found for sourdough panettone. A sweet take on bread!
📖 Recipe
No-Knead Dutch Oven Bread
Ingredients
- 3 cups 400g all-purpose flour, plus more for dusting
- 2 teaspoon 2g instant yeast
- 1¼ teaspoon 8g salt
- 1 ⅝ cups 320g water
Instructions
- In a large bowl combine flour, salt and yeast. Add water and stir to combine. Dough will be sticky and shaggy. Cover bowl with plastic wrap and let rest at least 12 hours (18 hours is better) at room temperature (70F).
- When dough is ready the surface will be dotted with bubbles. Lightly flour a work surface and place dough on it. Sprinkle with a little more flour. Fold the dough over itself once or twice. Cover loosely with plastic wrap and let rest 15 minutes.
- Shape the dough into a ball quickly and gently, using just enough flour to keep it from sticking. Generously coat a cotton towel (not terrycloth) with flour, wheat bran or cornmeal; place the dough seam side down on the towel and dust with more flour. Cover with another cotton towel and let rise for 2 hours. When ready, the dough will be more than double in size and will not readily spring back when poked with a finger.
- A half-hour before the dough is ready, start preheating your oven to 450F. Place a 5 to 8-quart heavy covered pot (cast iron) in the oven to also pre-heat the pot or container.
- When dough is ready, carefully remove pot from oven. Remove top towel from dough, then slide your hand under the bottom towel to lift the dough. Turn dough over into the pot, seam side up. Jiggle the pot a little if it looks uneven.
- Cover with lid and bake 20 minutes, then remove lid and bake another 15 to 30 minutes, until loaf is browned.
- Cool on a rack.
Nutrition
Nutrition values are estimates only, using online calculators. Please verify using your own data.

Delicious with soup!
Looking for a shortcut dinner roll in a fun shape? Check out my Easter bunny dinner rolls, made with crescent roll dough.


Jeff Albom
This solves my issue with kneading. I prefer chewy and crunchy bread.
Sula
Oh yes, chewy and crunchy - so good!
Alexandra
Love how easy this bread is to prepare - delicious! Homemade bread is the absolute best!
Sula
I agree, and the smell is out of this world!
Jessie
I love no-knead bread, we will be trying this this weekend!
Sula
Enjoy it!
Emily
I'm all about homemade bread now that I'm home all the time during covid. This recipe was simple and tasted delicious, the whole family loved it!
Sula
I'm glad, thanks for trying it out!
SHANIKA
I've never tried making bread, but I love how soft that this has come out! I love that it's no-knead!
Sula
Not spending so much time kneading bread was a game changer for me!
Big Trouble
This is PERFECT because most people I talk to who make their own bread don't like the kneading part! I'll have to share this with them!
Sula
The kneading is what always stopped me before!